Move · Videos · Mobility · 19 min
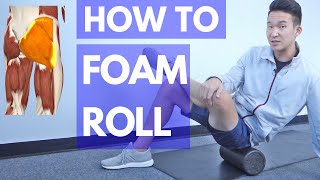
Foam Rolling for Beginners: A Full-Body Guide

Video by PT Time with Tim on YouTube · Open on YouTube · Is this yours?
Licensed physical therapist Dr Tim explains how to choose a foam roller, then shows how to roll the fronts, outsides and backs of the thighs, calves, glutes, upper and lower back and lats, and a chest stretch lying on the roller, with how often to roll when you're new.
- 19 min
- Beginner
- Low impact (no jumping)
- foam roller
Good forHealthy fascia
Step by step 10
Tap a time to watch that step in the video.
- Choosing a foam roller: the different lengths and firmness, and which suits a beginner. 0:37
- Front of the thighs: start with both legs, belly tight, and pause on tender spots for about 30 seconds. 5:26
- Outer thigh: roll from above the knee up towards the hip, stopping before the hip bone. 7:09
- Hamstrings: one leg at a time, hands beside you and hips lifted, rolling from knee to sit bone. 8:12
- Calves: both legs, then turn to each side, then cross one leg over for more pressure. 8:52
- Glutes: lean onto the outer buttock in a figure-four and relax on tight spots. 10:02
- Upper back: chin tucked, hug yourself to open the shoulder blades, hips up, roll and lean side to side. 11:19
- Lower back, only with good core strength: hold your shins and rock gently side to side. 13:10
- Lats: lie on your side with the roller below the armpit, staying off the ribs. 15:18
- Chest stretch lying along the roller with the head supported, arms in goalpost, Y and T shapes. 16:10
The steps are a summary in our words, checked against the video — the coach shows every move.
Form cues from the coach
- Stop rolling the outer thigh before you reach the bony point of the hip
- Lean onto the outer part of the buttock rather than the middle
- Only roll the lower back if your core is strong; hold your shins for support
What it works Whole body
Tap an area for more videos that work it.
Joints it uses light on the joints
- Neck moveshead held up with chin tucked
- Shoulders movespropping on the hands and forearms
- Wrists & hands moveshands down for hamstring rolling
- Upper back movesrolling the upper back
- Lower back movesrolling the lower back
- Hips movesrolling thighs and glutes, figure-four
- Weight on your hands. The wrists bend back under load. Fists, push-up handles or your forearms ease it.
- Down on the floor. You get down to the floor and back up again.
Easier option from the coach: Start with both legs on the roller; skip the lower back unless your core is strong
A rough guide from Notbroken to the joints this video’s moves load — not a medical assessment, and your joints may differ. Some ache is normal; stop if a joint hurts sharply. How joints are rated
More like this
 Foam Rolling Tour: Legs, Back, Lats and Chestjoetherapy · 15 min · all levels
 15-Minute Guided Foam Roller SessionWell+Good · 16 min · beginner
 10-Minute Full-Body Foam Roller RoutineMobility Doc · 10 min · beginner
 Lower-Body Foam Rolling Routine with a Massage Ballmobility by julia reppel · 17 min · all levels
 Four Foam Roller Moves for Quads, Hips, Hamstrings and GlutesCleveland Clinic · 5 min · all levels
 Everyday Physio Exercises for Sore KneesJessica Valant · 13 min · beginner
Video by PT Time with Tim; the summary, steps, cues, body areas and joint notes are Notbroken’s, written from what the coach actually does in the video and checked a second time. Warm up first, take the easier options until a move feels easy, and stop if you feel sharp pain, chest pain or dizziness. General instruction, not advice for your body. About & safety